8.000 Update
For all of you interested in the new Custom Cabinet Estimator, here is what David and I have been working on.
Fixes added so far:
- Default Cabinet Widths were missing, and have been added.
- Pull Down Value Lists (i.e., door model selection, material selection, etc.) were small, hard-to-read text. This has been fixed.
- Light Rail Finish Selection was not working, and has been fixed (it was using the Crown Finish Selection field previously).
Added so far:
- New Finish Options cost calculations added to Finish layout (this one is pretty awesome).
- All primary List views have had the cost fields added and made editable (similar to Batch Edit).
- Back for Forward navigation added to all primary Item layouts to quickly move from one item to the next, or back.
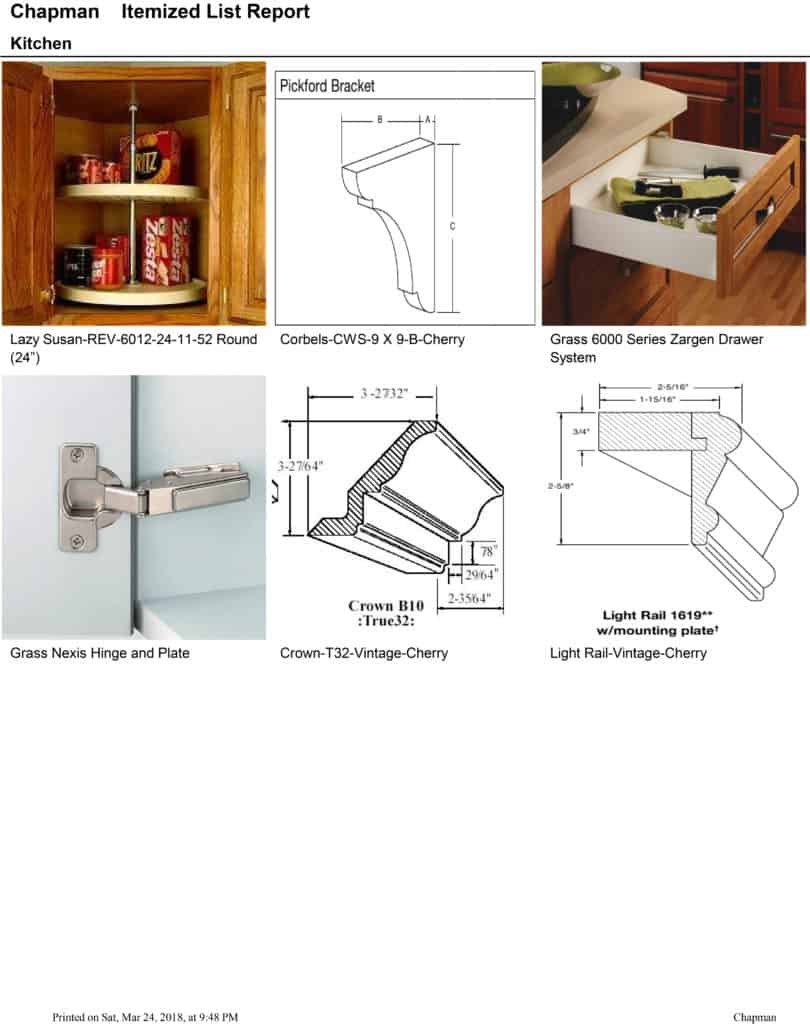
- New Report option for an additional Items Listing page that includes images for Hardware, Accessories, Trim, and Molding (super awesome).
- Backup Options added to Preferences.
- Box count fields added to each cabinet type tab.
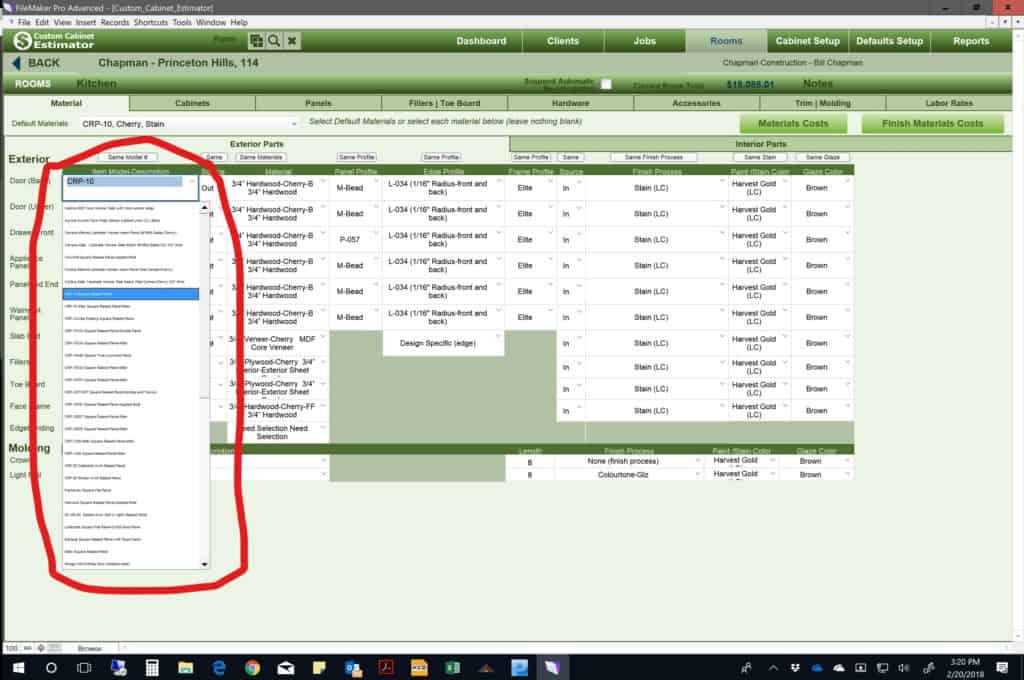
So to brag on a couple of these, let's look at the old version of the Pull Down Value List (in the old version, the words were so tiny it was very difficult to read them on a high-resolution monitor).
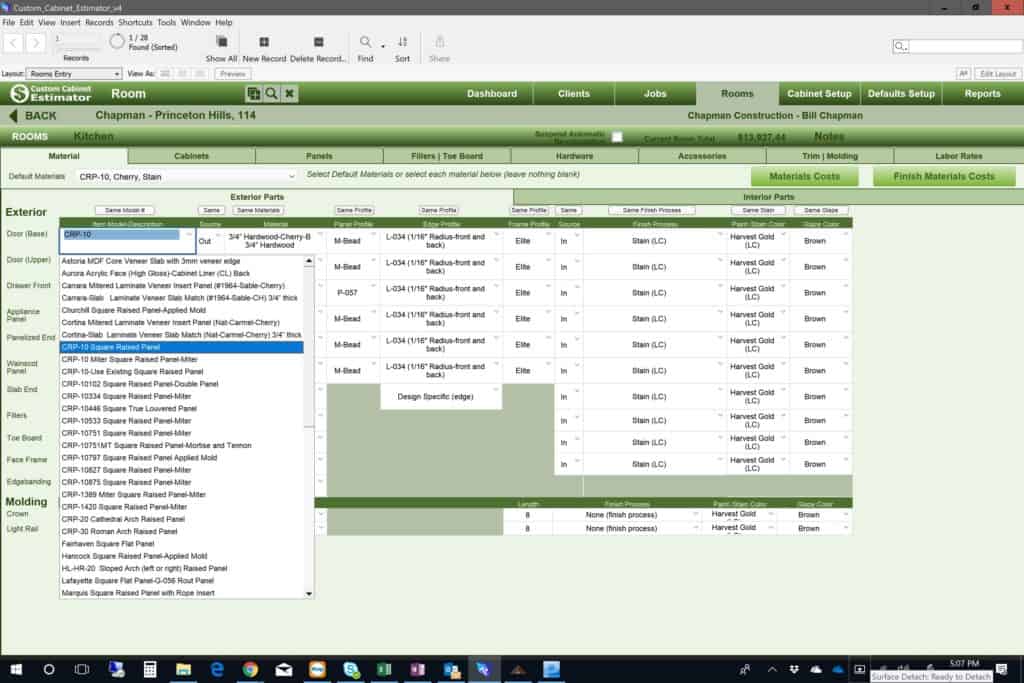
And now the Pull Down Value List looks like this after the upgrade.

I think we can call that an improvement.
Itemized Report Images
Another cool feature we are adding is images to Reports (optional). This was something Danny Castle requested a good while back, and Jay Miller gave a big amen to Danny's suggestion and then became a persistent advocate for the feature. You can still have the detailed list you are used to, with the quantity and pricing information, but in addition, you can have this additional page or pages with images to clarify the customer's selections.
The caveat to this one is you need to have good images in the images field for items you want to show on your reports (if there is no image, nothing will show on the report for that item), and if there is an image for your internal use, but you do not want it to print on reports, you will have a radio button that will allow you to specify that the image for that particular item does not show on reports.
Another caveat is that for the time being, images only work for Hardware, Accessories, Trim, and Molding. The Doors and Drawer Fronts are going to be a lot more challenging since the images need to not only include the image of a Door and a Drawer Front but also the profiles chosen for the Doors and Drawer Fronts. Hopefully, we can make that happen in the next version.

Finishes are even more complicated because they stack (you have the finish type/color, but then you have finish options like glazing, antiquing, and distressing), so the image would be nearly impossible to determine without a lot of back-end logic built in (the combinations are limitless). Even if we could do it, not sure we should as this could create unanticipated consequences ("That color on my cabinets does not look like the color on my screen or on the page I printed out with my $10.00 garage sale printer"). All that to say Finish images might be several versions away if it is even possible with our current structure.
Finish Options Cost Calculator
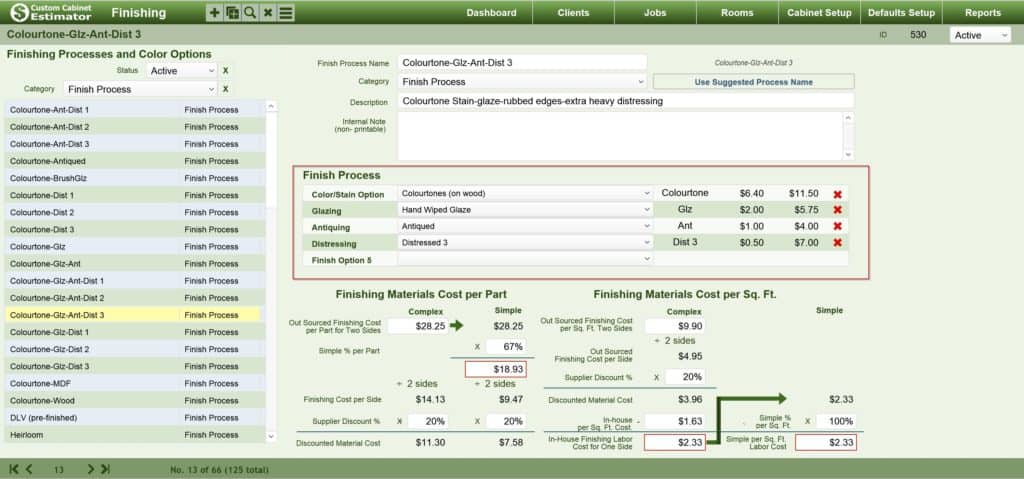
Next up is the new Finish Options cost calculator. In past versions, if your finish had any finish options (glaze, antiquing, or distressing), you had to add those stacked costs up and enter them into the per part and/or the per square foot fields. Well, those days are over now, we have added a new interface onto the Finish Setup screen where you can choose the stacked Finish Options and your Finish per part field and Finish per square foot field will be populated automagically.
Just as helpful is when you need to edit these Finish Processes that include stacked Finish Options, just update the costs of the Finish Options, and all your Finish Processes will be updated as well (the new area is surrounded by a red box in the image below).

A really cool feature that we included with this is that it will name your Finish Process for you, simply put something in the name field to allow you to start filling in the other fields, answer the Finish Options questions, and as you choose each Finish Option, you will see our proposed Finish Process name just above the 'Use Suggested Process Name' button, and then click that button and your Finish Process will have a well structured, and consistent name. You even get to choose the abbreviations that will be used in naming the Finish Process on the Preferences page.
Edit in List View
Last, but not least, we have added all the cost fields to all of the item List Views (Doors/Drawers, Door/Drawer Profiles, Accessories, etc.) so you can edit prices from the List View (seems faster to most users to do it this way), but also added the ability to navigate from one item to the next from the detail interface as well.
To summarize, these are just a few examples of what is being changed/added in the new, much more affordable Custom Cabinet Estimator. I'll keep everyone posted as to our progress, and when we have it ready to launch.